
Creating Agents
Walkthrough for creating your first AI sales agent, from signup to an agent that can take a call.
An agent is the persona, system prompt, and voice your AI uses when it talks to a lead. Before you can launch a campaign you need at least one agent. This page walks through the full flow end to end.
Prerequisites
- A verified AIMA Labs account. If you haven't signed up yet, start with Getting Started.
- An active organization with a subscription. New organizations are routed through the plan picker before the dashboard becomes available.
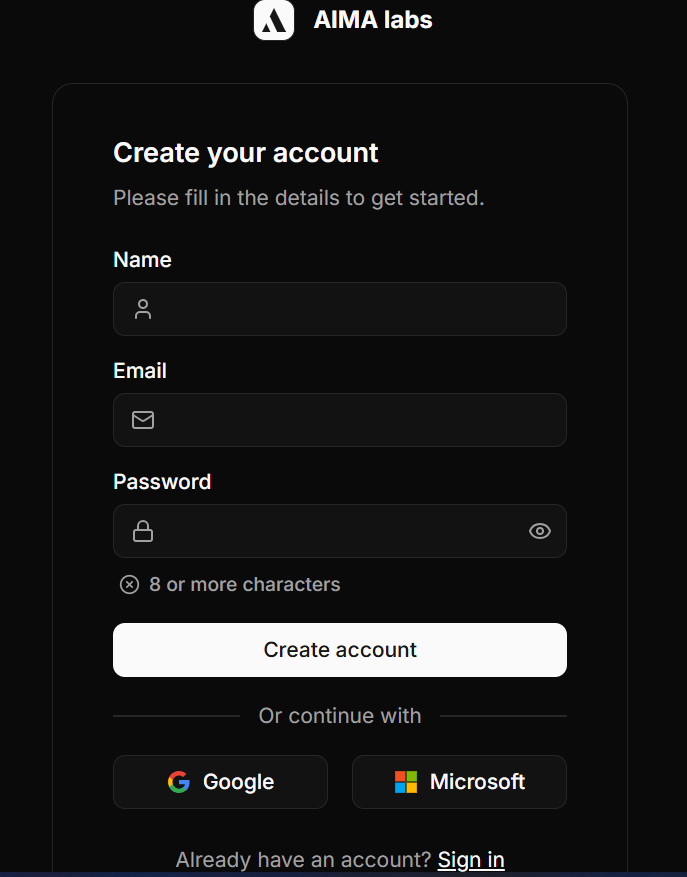
Step 1 — Sign up and verify your email
Go to the sign-up page, create an account with email + password (or use Google / Microsoft SSO), and click the verification link we send you. You can't create agents until the email is verified.
Step 2 — Complete onboarding
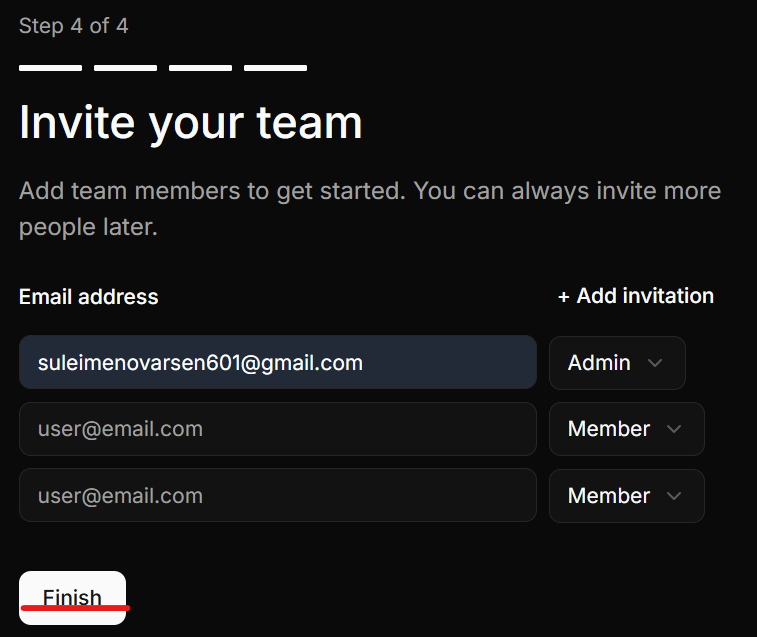
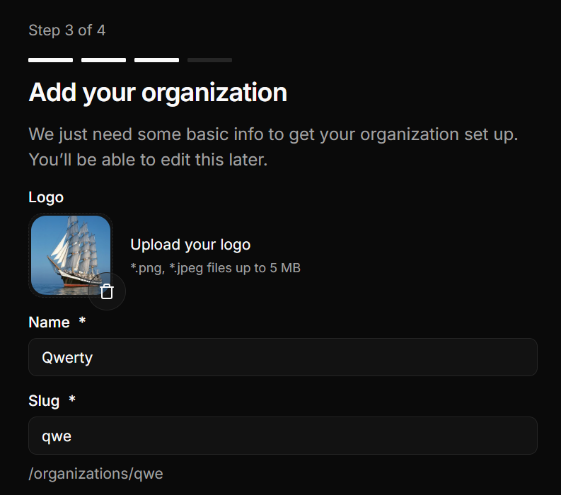
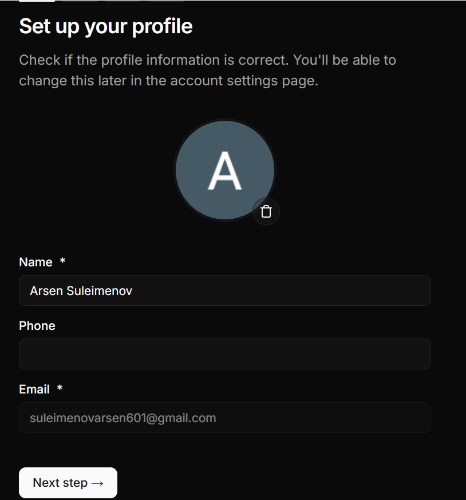
On first sign-in you'll be walked through a short wizard:
- Profile — your name and avatar.
- Organization — the workspace your team will share.
- Theme — light or dark, you can change this any time.
- Invite team — optional; you can also invite teammates later from organization settings.
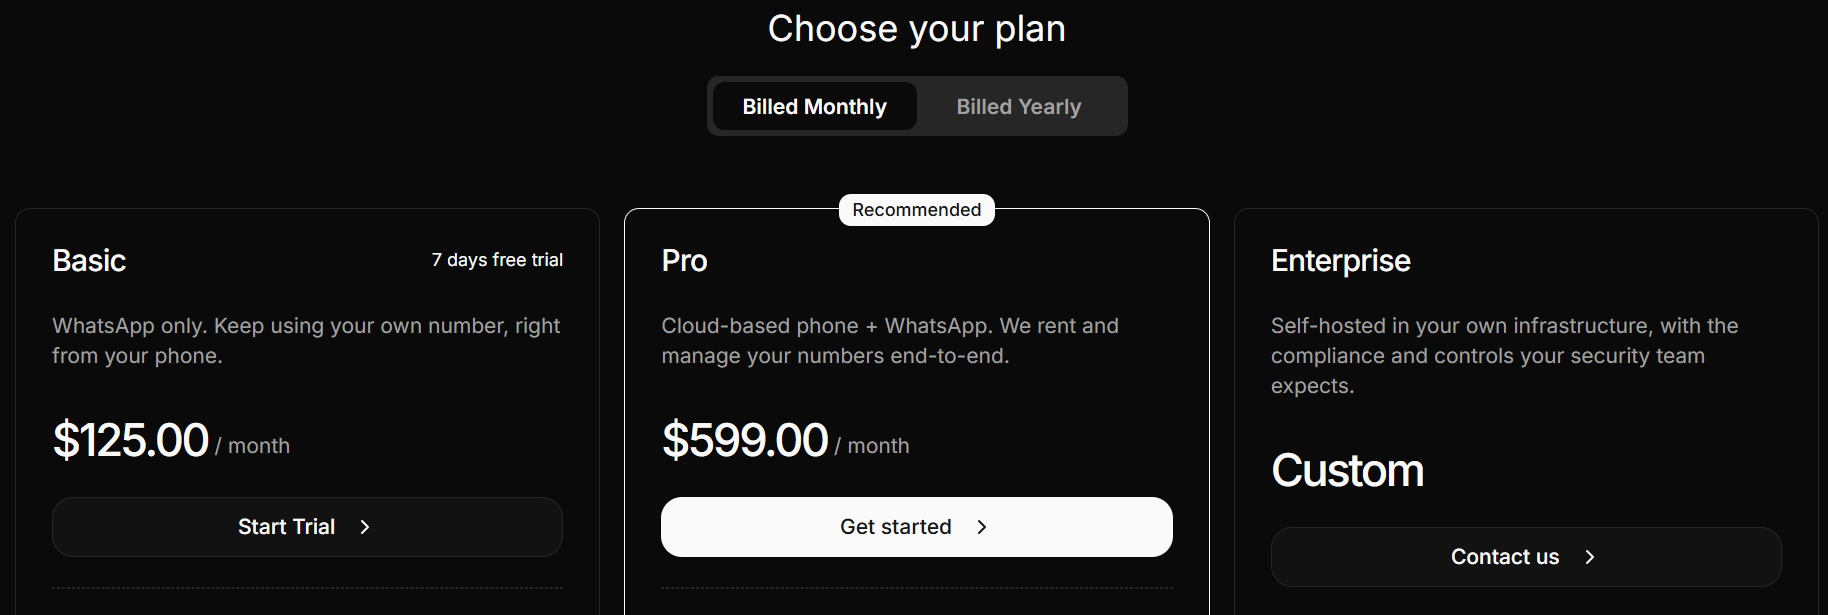
Step 3 — Choose a plan
New organizations are sent to the plan picker. Click Get Started or Start Trial on the plan that fits. Agents, campaigns, and leads are gated behind an active subscription — if billing lapses, the dashboard redirects back to the plan picker.
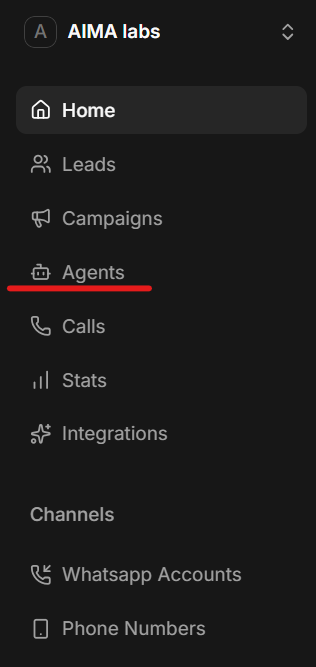
Step 4 — Open the Agents page
From the left sidebar, click Agents. This is where every agent in the organization lives. From here you can open an existing agent or create a new one.

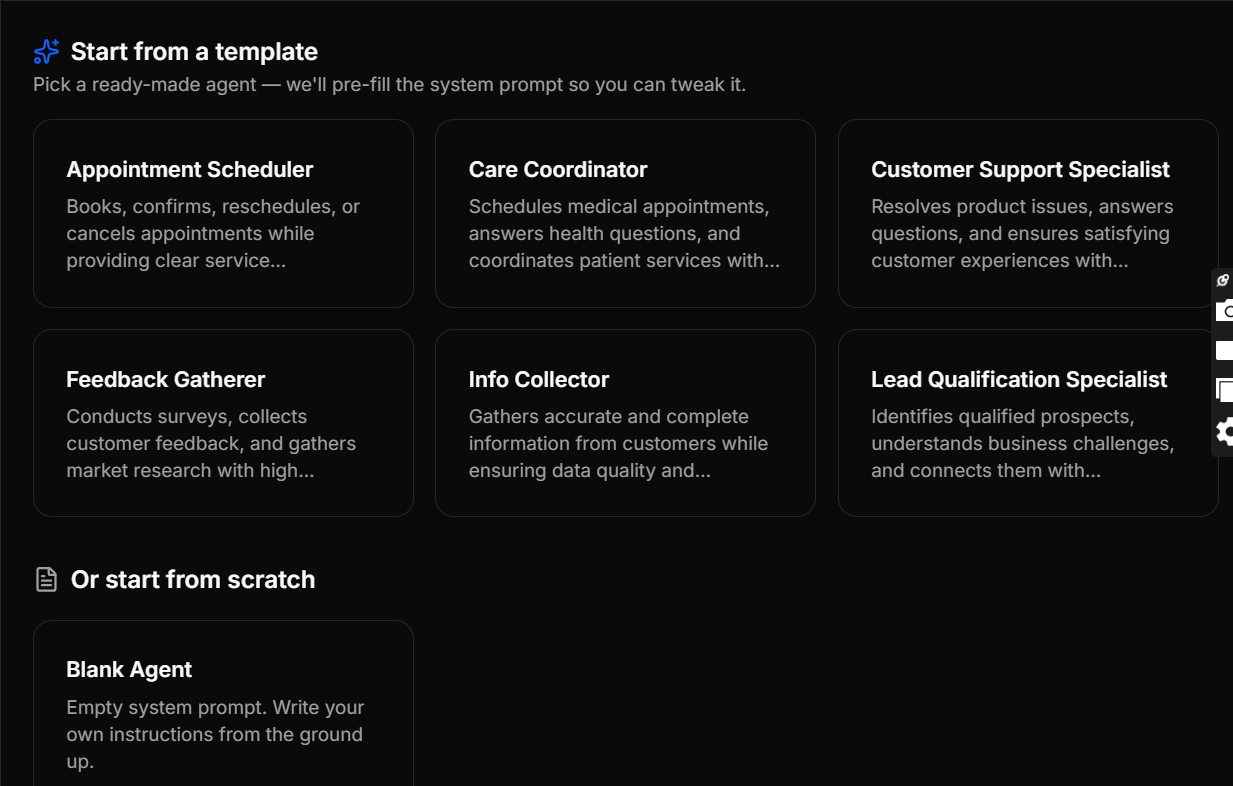
Step 5 — Pick a template (or start from blank)
Click Create agent. You'll see a template picker with a few prefilled starting points — sales development, support, qualification, and so on. Pick one to start with its system prompt pre-filled, or choose Start from blank to write your own.
Step 6 — Fill in the agent form
The create-agent form has two kinds of fields: identity and the system prompt.
Identity
- Agent Name — the name your AI uses when it introduces itself.
- Company Name — the organization the agent represents on calls.
System prompt
Your prompt defines the agent's behavior. We recommend structuring it with these sections:
# GOAL— the single outcome the agent is optimizing for (e.g. "book a 15-minute discovery call").# ROLE— who the agent is (e.g. "sales development rep for AIMA Labs").# AVAILABILITY RULES— working hours, time zones, how far out they can schedule.# CONVERSATION STYLE— tone, pacing, formality, language.# INSTRUCTIONS— concrete dos and don'ts, objection handling, what to never say, when to transfer.
Click Create agent when you're done. You're dropped into the agent detail view.
Step 7 — Enable calendar scheduling
If your agent needs to book meetings, connect a calendar so it can pull availability and create events.
- Open the agent detail view.
- Click Enable Calendar.
- Authorize Google Calendar when prompted and grant the requested scopes.
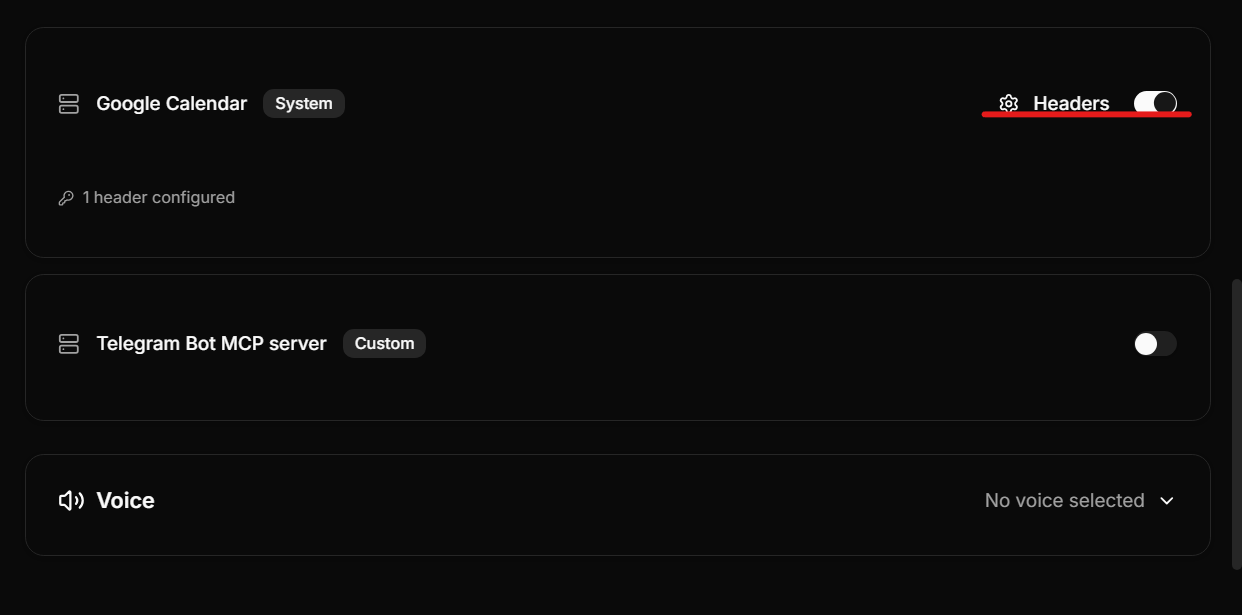
The calendar credential is stored on the organization and reused by every agent that books meetings. See Integrations for the full list of what you can connect.
Next step
Your agent isn't doing anything yet — it's a persona without a lead list. To put it to work, create a campaign that points it at a list of contacts: see Campaigns.